Review: We R Memory Keepers Envelope Punch Board
You may have caught on that I have a bit of a stationery addiction and having recently gotten bored of using plain envelopes for my penpal correspondence I decided to look into alternative ways of jazzing up my letters by making my own envelopes.
If you are the patient sort you will be able to work out and draw the net for an envelope with only a ruler and a pencil, however, if you’re more like me and prefer to use a gadget to help you then there are a range of craft products out there to use, like the We R Memory Keepers Envelope Punch Board which I discovered on Amazon.
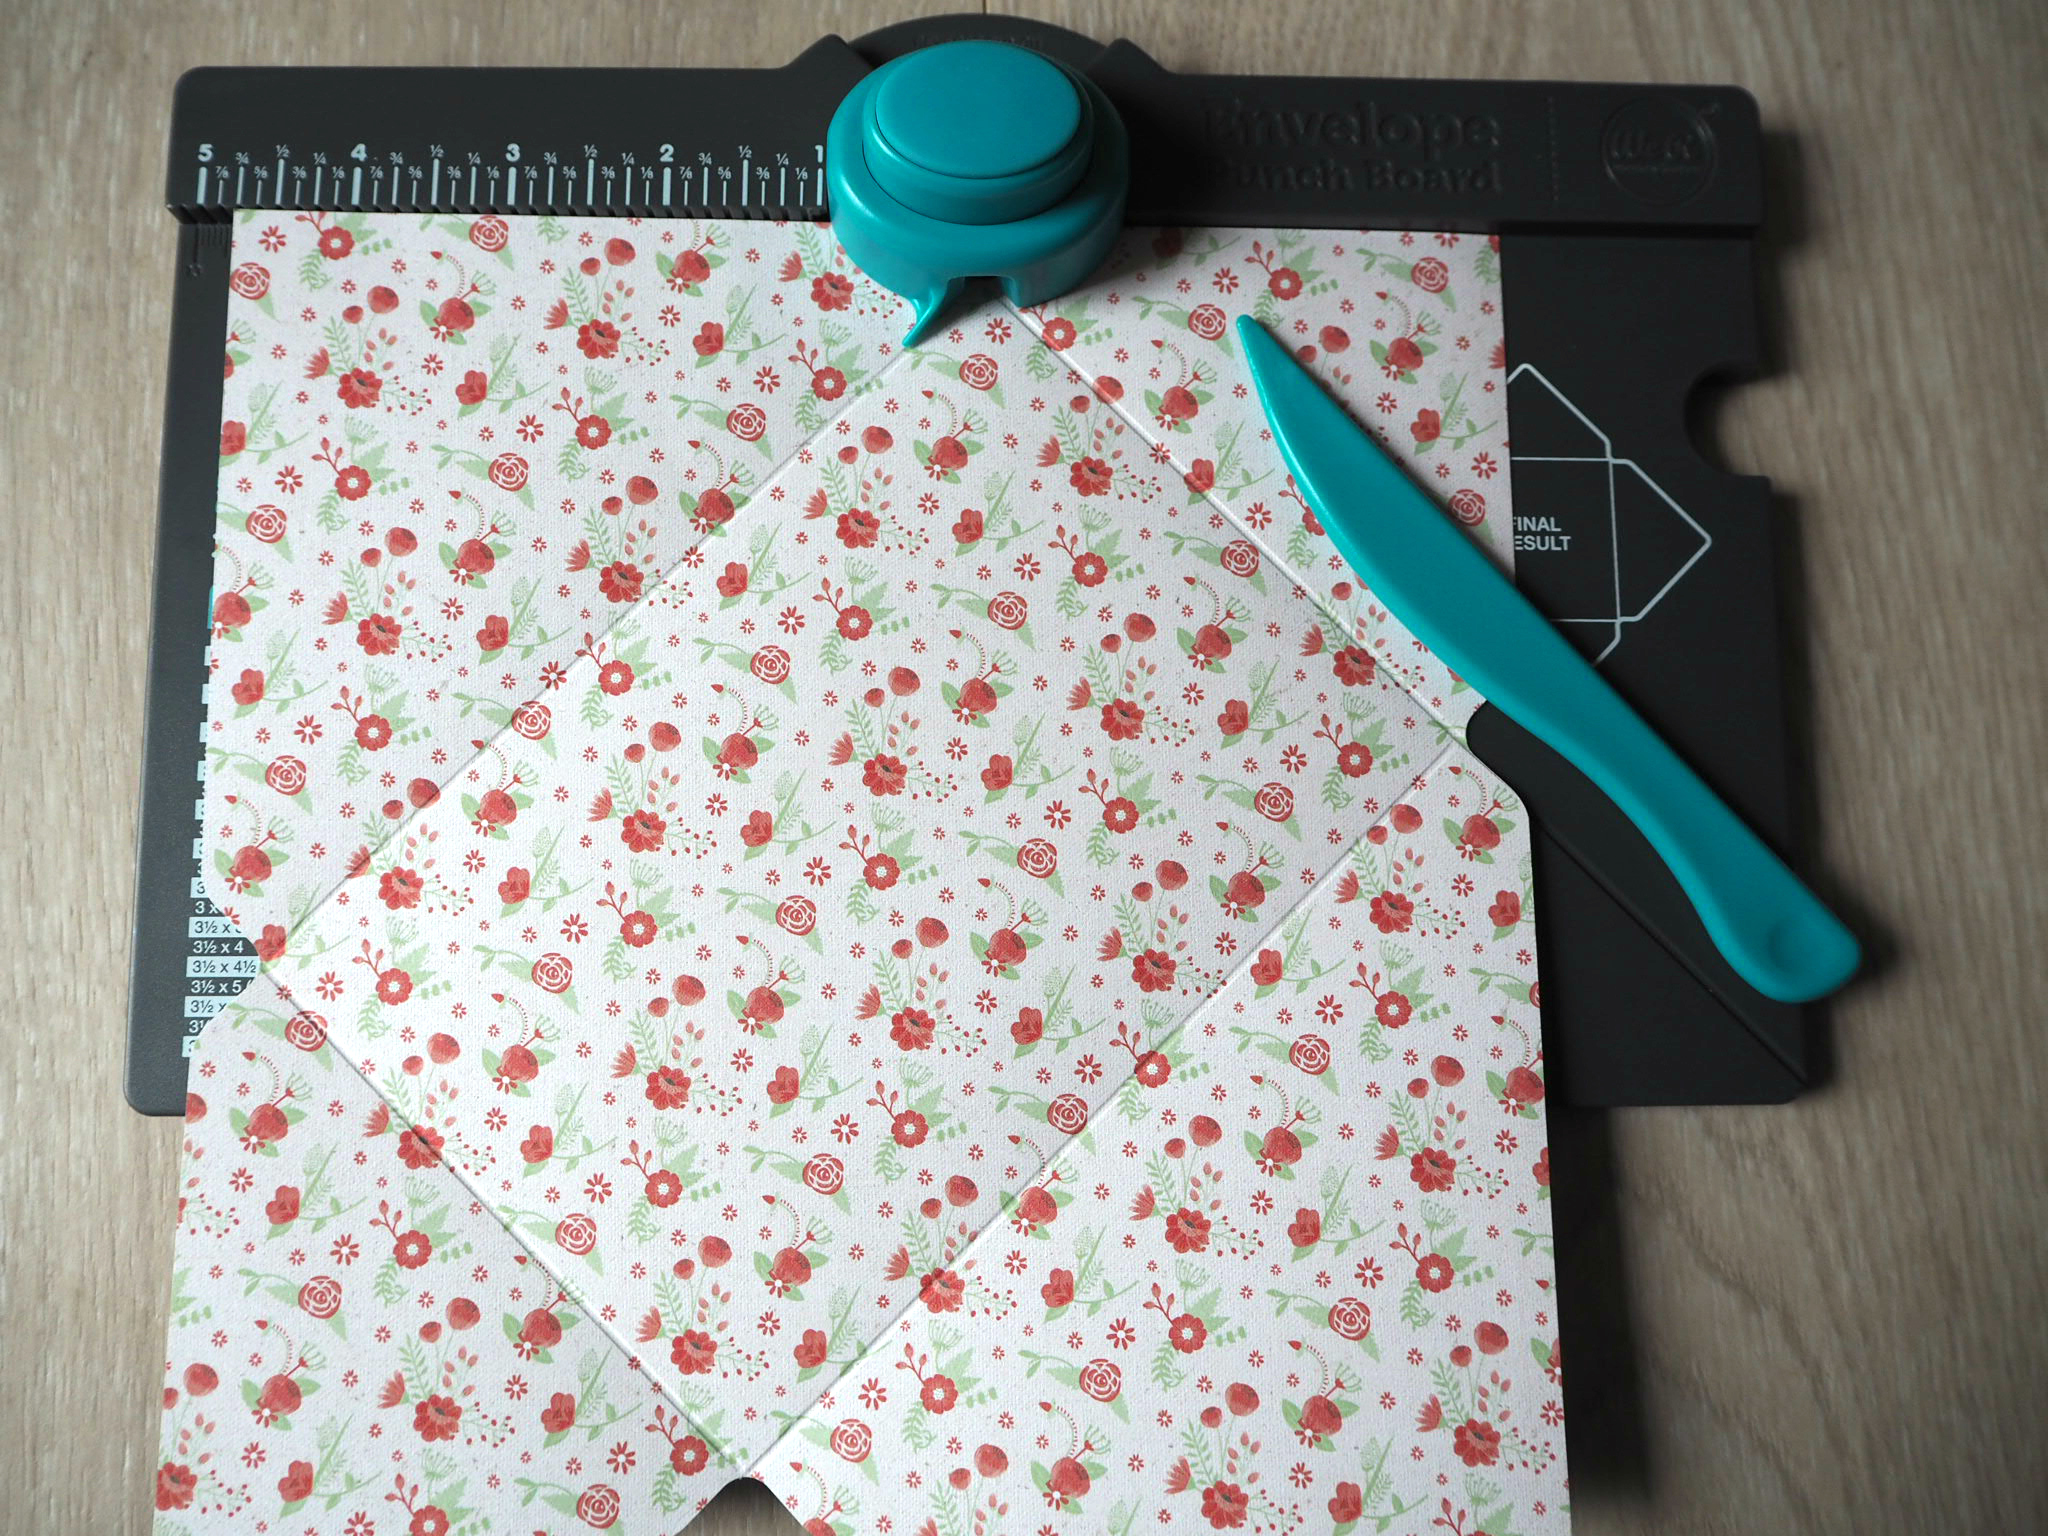
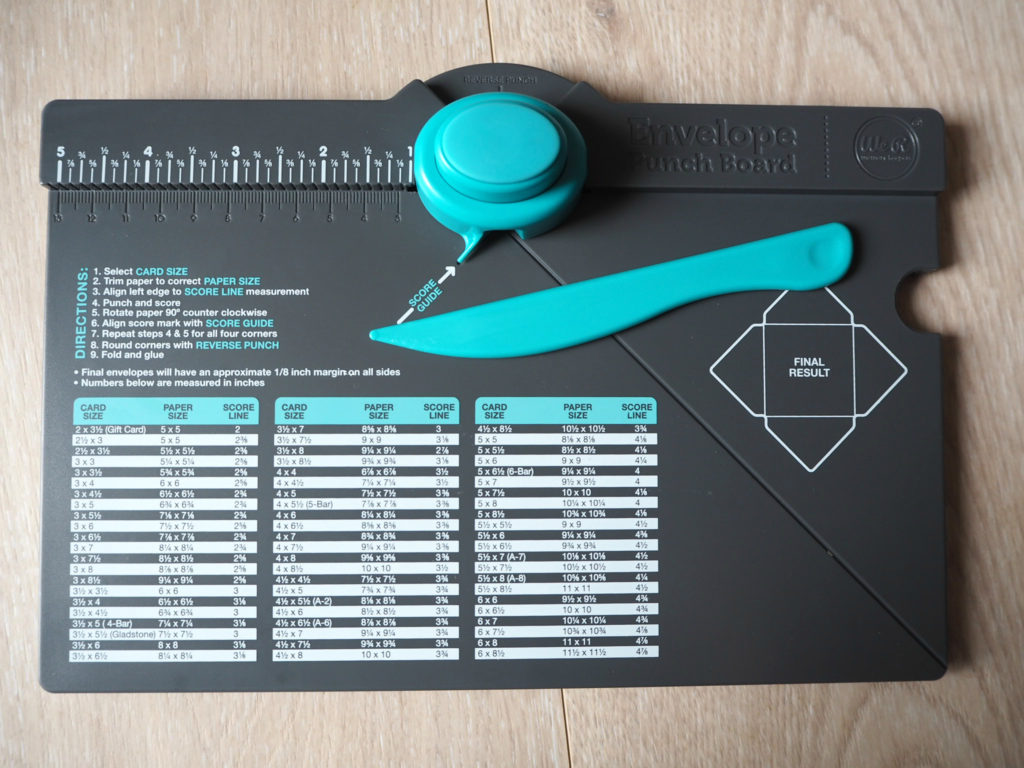
An envelope punch board is designed to help you easily make bespoke envelopes in dozens of sizes. The We R Memory Keeps board provides a scoreboard (with score groove guide), 2-way envelope punch, bone folder (a creepy name for the scoring tool to make folds easy) and measurement chart to make sure you get the right dimensions.
The punch board is easy to use and even has the instructions printed on the front for you to follow:
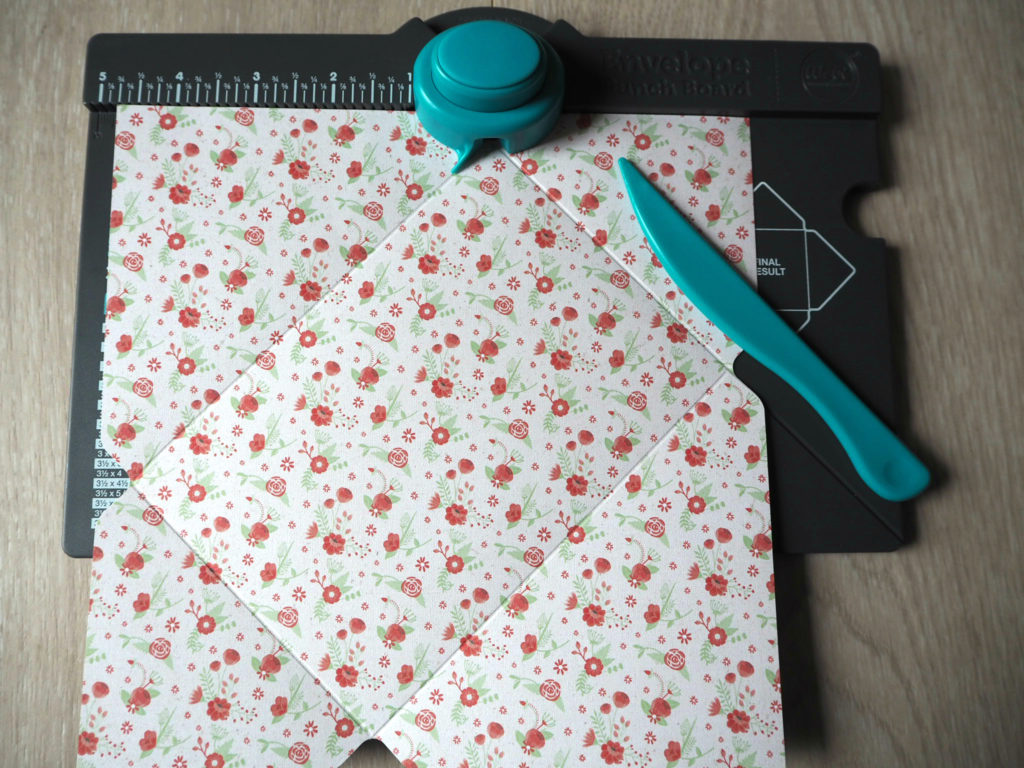
- Select the size of your paper by using the measurement guide for the size you desire (I have focused on 4×6 inch which is perfect for my penpal letters).
- Line the left-hand edge of your paper up with the ruler at the top of the board, using the score line measurement from the guide.
- Press down on the punch to create a perfect notch and use the bone folder tool to score the paper along the score groove guideline in the scoreboard.
- Rotate your paper 90 degrees, this time rather than lining the paper up with the ruler, line up the score mark you just made with the score guide on the middle punch; punch, score and rotate as before.
- Continue punching, scoring and rotating around until you’ve done all 4 corners of the envelope. You have created your net!
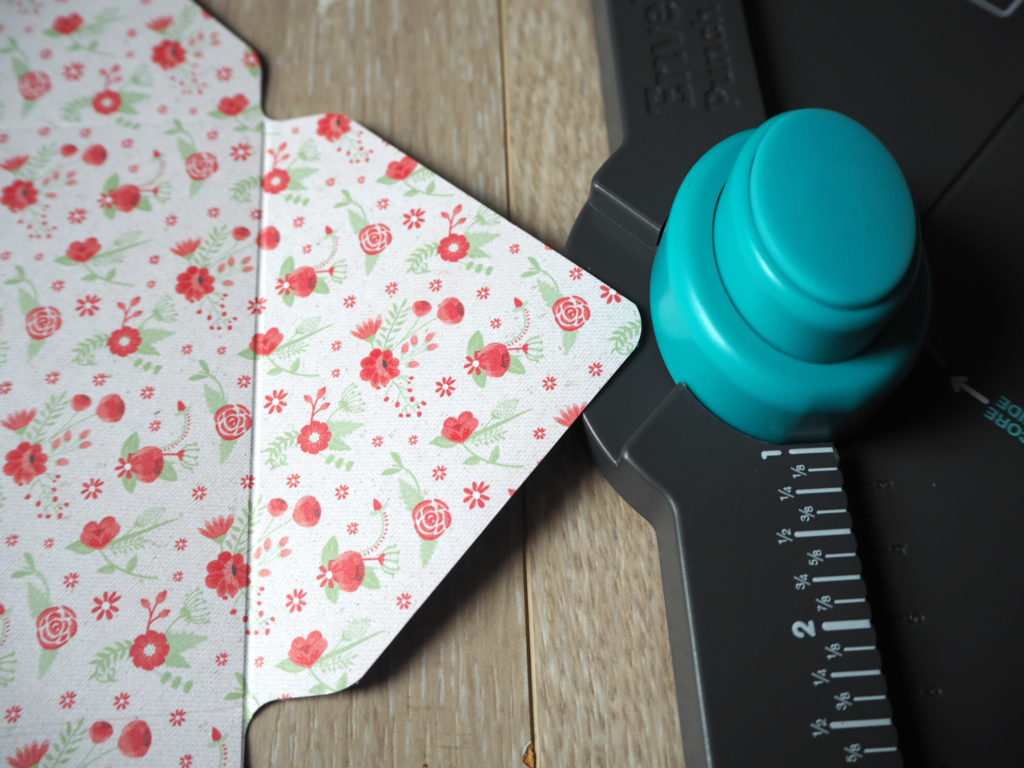
- Neaten up the corners by using the reverse side of the punch – slip the corner into the slot and press the punch to create a nice round corner.
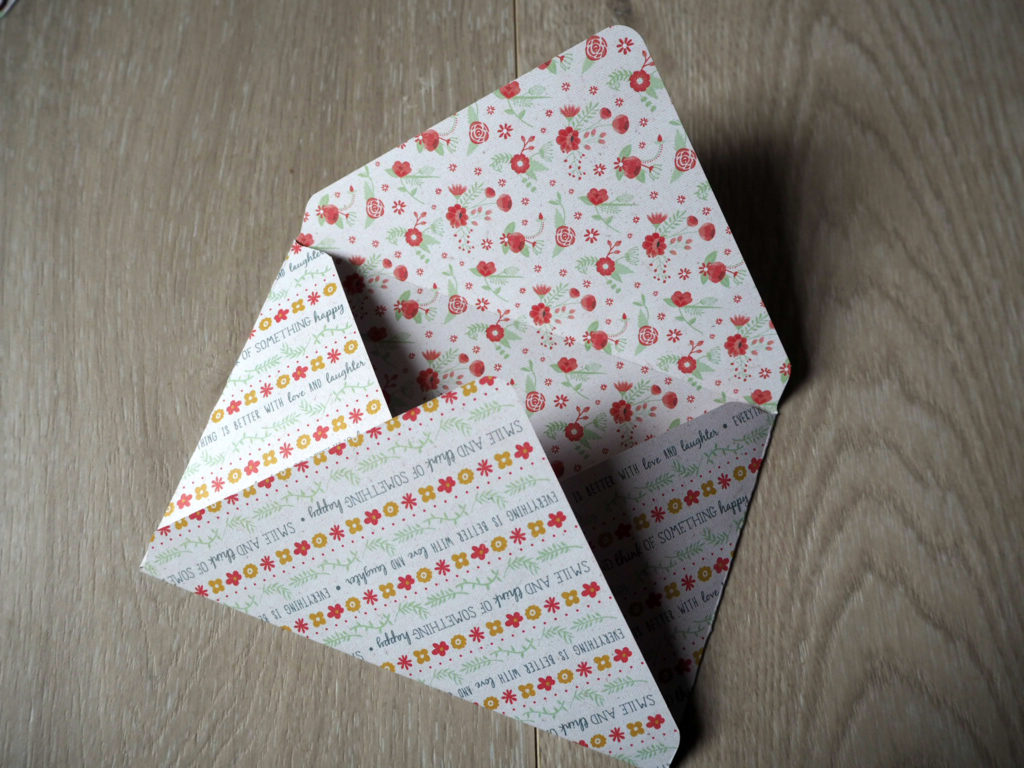
- Now simply fold along all the score lines and apply your preferred adhesive (I use a Fullmark glue roller)
to the bottom panels to create the envelope shape.
This might sound fiddly but in reality, it’s just measuring, punching, scoring and rotating. After discovering how easy it was I was able to make lots of envelopes in a matter of minutes! I now have a stack of bespoke, pretty envelopes which I have made in stock ready to be sent out around the globe to my penpals.
So far I have not found any problems using the We R Memory Keepers Envelope Punch Board, but it does pay to be exact when aligning and punching the paper. I really love how the bone folder tool conveniently slots into the board so it doesn’t get lost between uses.
I have really loved using the We R Memory Keepers Envelope Punch Board to create my own fancy envelopes and recommend it to anyone who is bored of using boring, plain stationery for sending letters. I award the We R Memory Keepers Envelope Punch Board 5 out of 5 stars and can’t wait to get some more paper to make some more envelopes with it!
![]()